
Shaker-style Bedside Table
A few weeks ago I was a one of several participants in the Perth Hand Tool Event (formerly Lie-Nielsen Hand Tool Event). For several years it has been an honour to be invited to demonstrate something to do with hand tools. This year I decided to build a bedside table (or night stand).
Why a bedside table? Well, I thought I would kill two birds with one stone. My son had been asking for a new bedside table, and I had put it off for a while. The more I thought about it, however, the more opportunities I saw for a demonstration. There would be mortice-and-tenon joints for the legs and rails, which could be draw-bored. Connecting the front there would be sliding dovetails, and then there would be drawer construction, with dovetailing, grooving and shooting, then fitting a solid drawer bottom. The tabletop would feature breadboard ends, with rebates and more mortices …. And I would build one each day of the weekend event! Ha. Ha. Ha.
I prepared by building the framework of a table that I could knock down for viewers – just like Roy does. Then I cut and dimensioned enough pieces for two tables, packed the car, and off to the Tool Event I went.
Well I had a great time. The best Tool Event ever for me. Usually I miss my time in the workshop, but this time I got to build something and chat to everyone. Plus Terry Gordon (HNT Gordon planes), Chris Vesper (squares, marking knives, etc.), and LN Tools were there, and we are old friends living at the opposite ends of Australia. It is always great to get together.
As expected, my aspirations were slightly optimistic! I did not get close to finishing a table each day. In fact, I did not finish a table in the two days. Too much chatting and not enough working! Still, I managed to finish the carcass for one table …

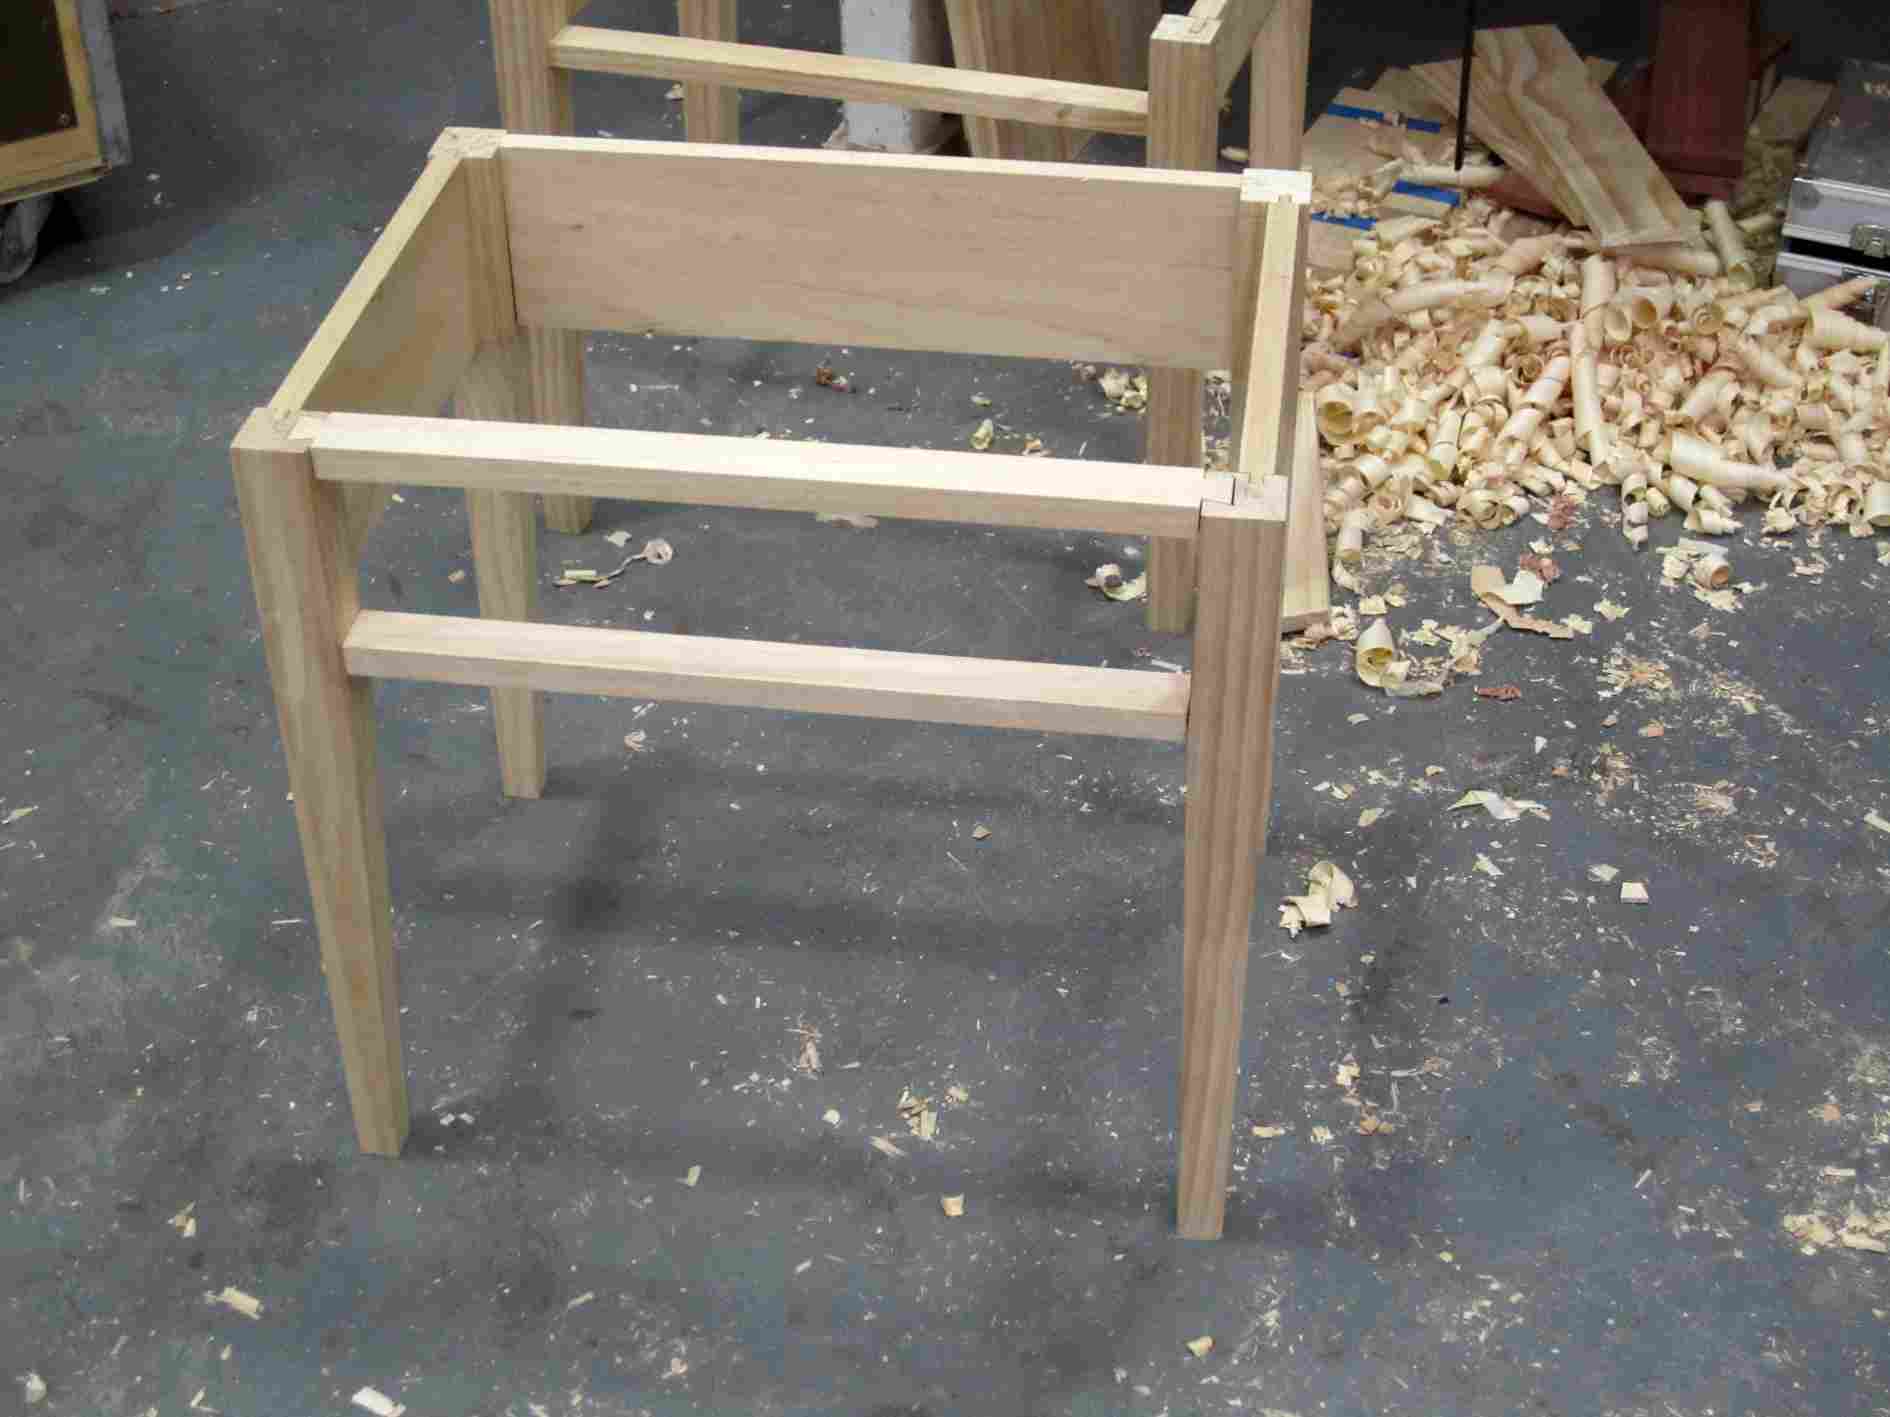
Yes, I built it out of Pine. It was cheap. It was a demonstration you recall. What about my son’s table? Well, I had a plan. Wait and see.
It has been a long time since I built anything out of Pine. It was delightfully easy. The mortice chisel sank its full 1” depth in a single stroke. The tenons were a breeze to saw. And the tapered legs yielded to a scrub plane without any opposition.
So at the end of the weekend I took the pieces home and my son gave me the look that said, “so where is the bedside table you promised me?” It was time to get busy in the workshop.
I must have built a half dozen of these tables over the years. This one has a few novel features that you may find useful if considering constructing a version.
Below are the pieces: the four legs, two sides and the rear section, all with drawbored tenons … There is a section under each side/end piece that doubles as a bead (on the outside) and support for the drawer (on the inside) …

The mortices. These intersect from each side on the rear legs. Each creates a stub tenon corner joint for maximum resistance to twist.

Below are the sliding dovetails that lock the front legs and support the drawer …

… and the two stretchers at the front, one sliding dovetail and one blind dovetail.
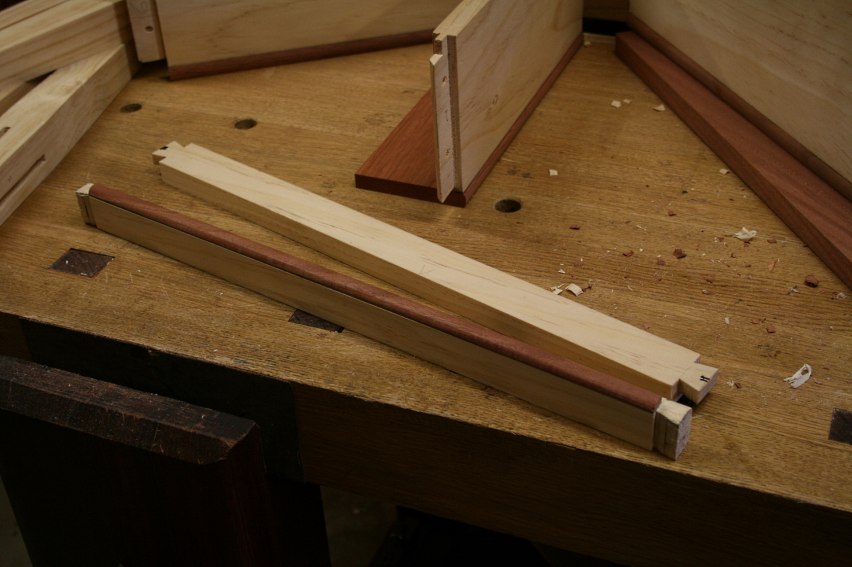

The drawer uses a Jarrah front (I said I had a plan). Half blinds at the front and through dovetails at the rear. However the interesting part here is that the drawer bottom, which doubles as a drawer stop. It is usually not recommended to place the stop at the rear, but this is soft wood and less likely to move much.

Below is the drawer back pressing against the rear of the carcass …
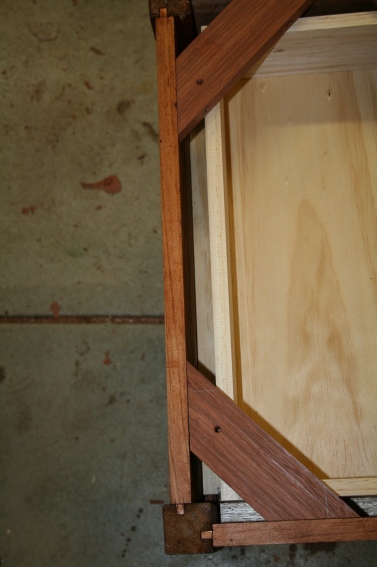
.. and below is the fitted drawer. The bead is not joined to the drawer front but to the stretcher below the drawer. It was shaped from an adjoining section of the board that made the drawer front so that the grain would continue through it.
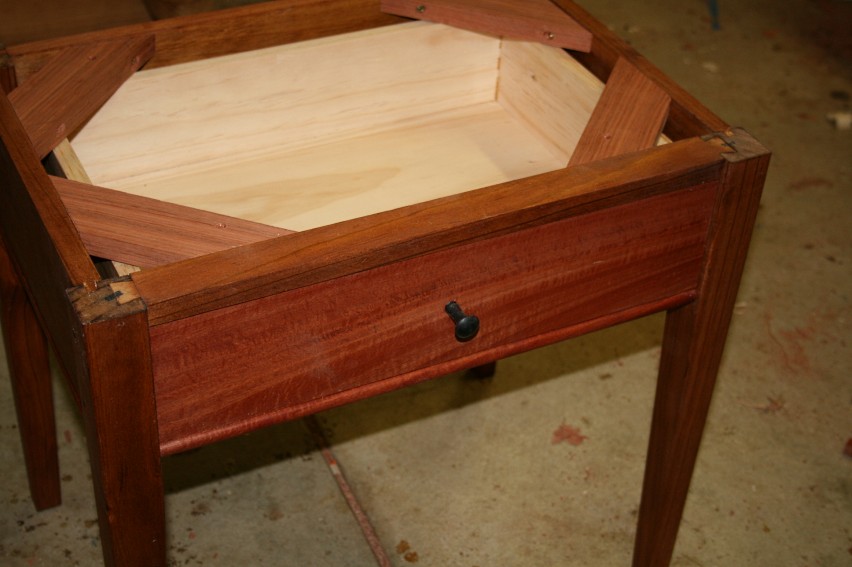
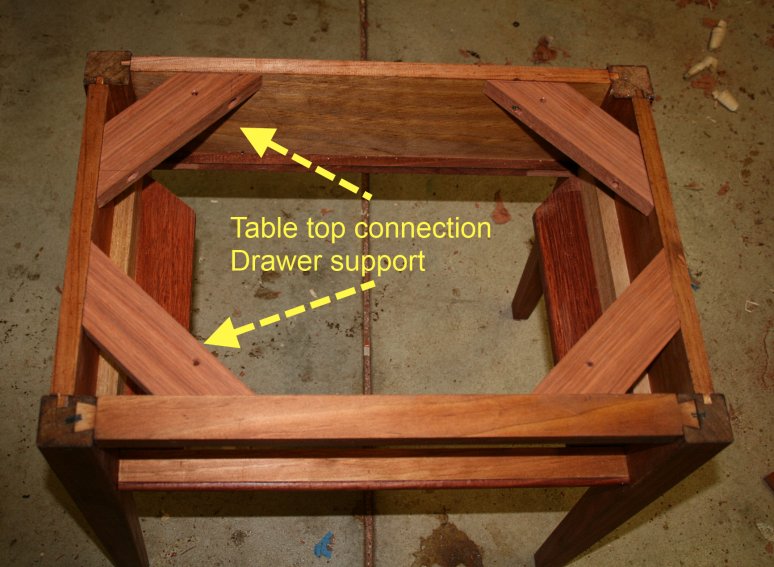
Another combination strategy was to use what look like corner braces, but not intended as such and are, instead, connections for the tabletop, and to use the front pair to support the drawer when it is extended.
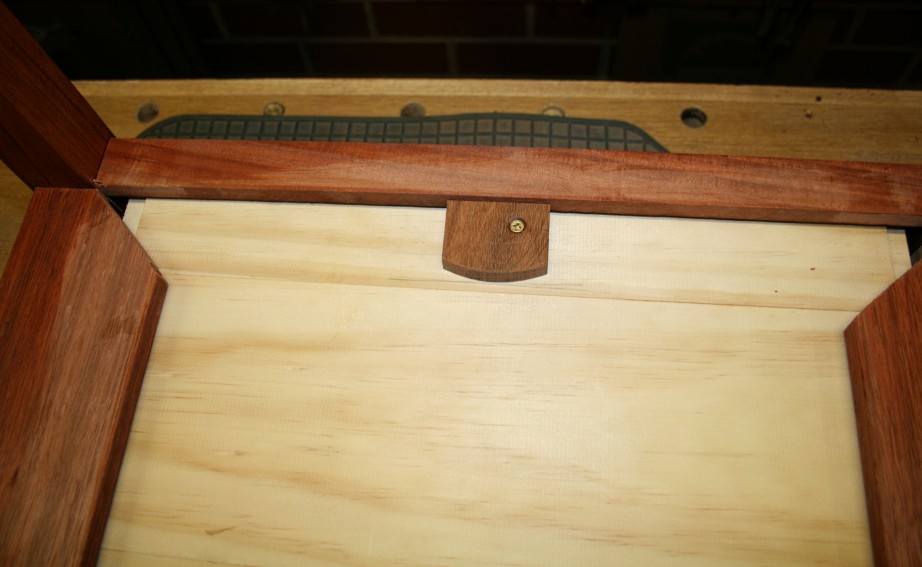
To prevent the drawer falling out in full extension, a stop was added at the rear of the drawer.

The drawer stop is designed so that it may be adjusted for depth, if necessary. This is achieved with an offset screw and a curved front edge. A twist to one side will reduce the extension, and a twist to the other increases it.
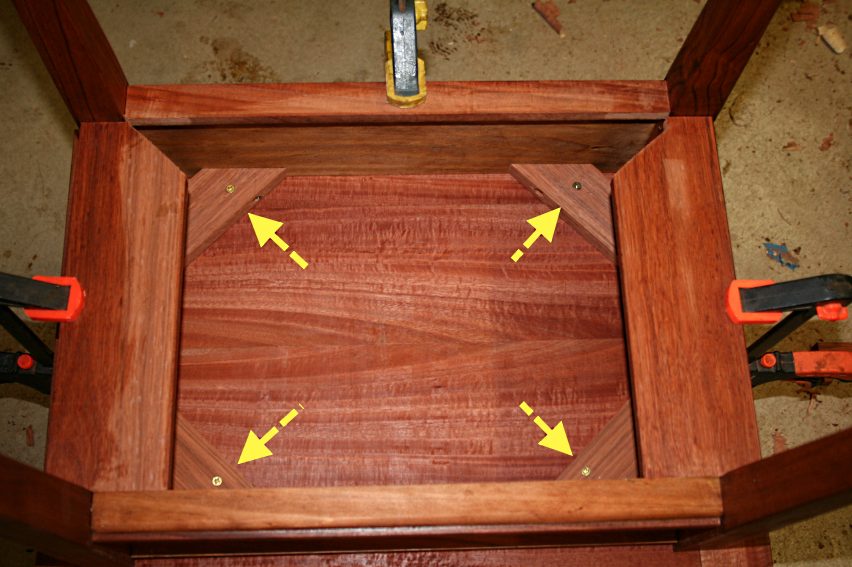
Below is the table upside-down with the top screwed on. The screws enter enlarged holes to account for any movement in the top …
Finally, the table is complete, given a couple of coats of Danish Oil and waxed … oh, did I mention that the Pine was stained (one coat of Oak – too brown - and one coat of Jarrah – to get a red match).

Inside the house I took a couple of photos before it disappeared forever into my son’s cave.
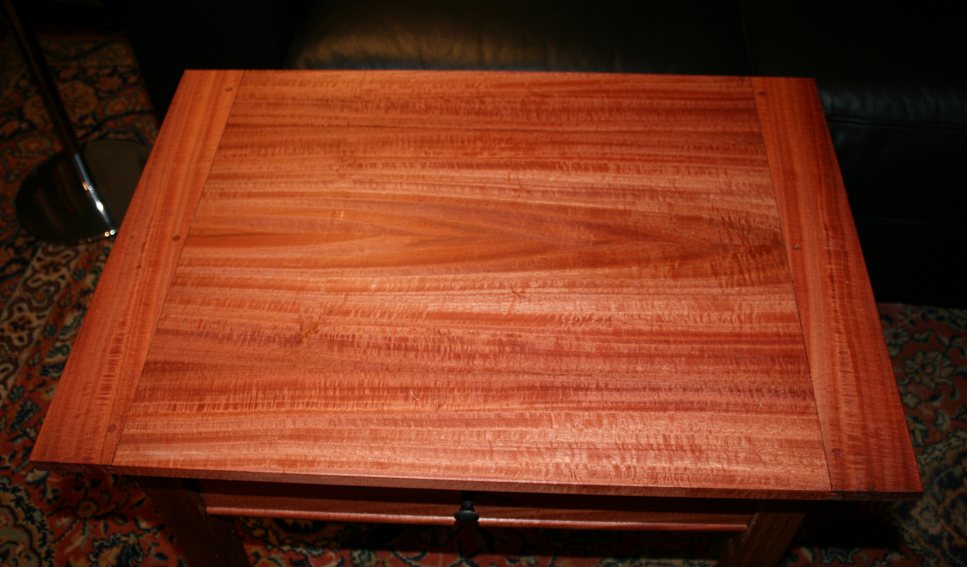
Oh yes, Jarrah top as well. With Jarrah breadboard ends. I said I had a plan …
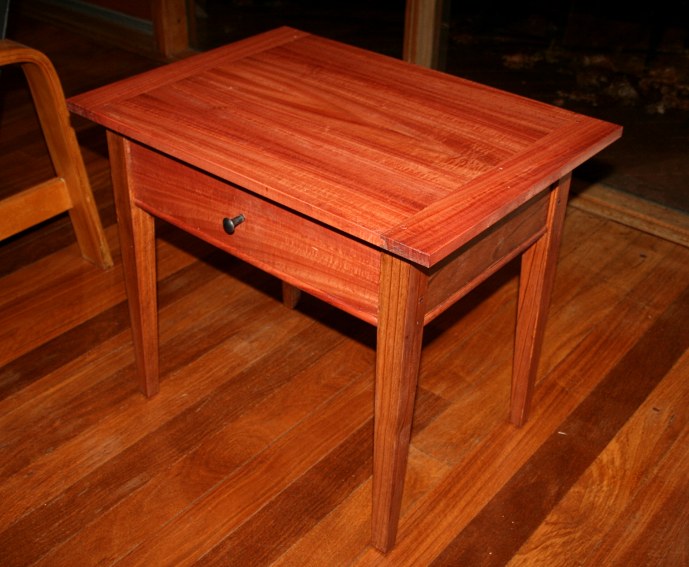
The Jarrah is a rather interesting curly variety, lighter and pinker than usual …
Here is the drawer extended fully (supported by the braces I mentioned earlier).

Final dimensions …
Height: 21”
Base: 21” wide x 15” deep
Top: 2” overhang on the sides and 1 ½” on the front/rear.
I hope something here helps with your own build.
Regards from Perth
Derek
April 2014