The bench top is complete!
Well, almost. The tail vise needs to be bolted in - however I can only do that later. All work is done in preparation.... which means the end cap is completed. How this was to be built was the subject of the last post.
The final length of the bench top is 75", which is a little longer than I expected. About as much as I could have hoped for. The width is 21", which is what I aimed for. Perfect.
So what about the end cap? How did this turn out?
In
the end the design was determined by the wagon tail vise. This
requires an end cap with strength as the tail screw will create
pressure at that end of the bench. This means that the end cap does
need to be bolted to the bench. I checked with Jameel, and he
confirmed this. I took the easy way out here and used ordinary coach
bolts. I did grind and polish the ends, but no one will notice ...
just being a little obsessional ![]()
The important aspect with the end cap is that it needs to have the ability to move, to expand and contract with changes of the weather. One end is fixed (bolted) - which has to be around the tail vise - and the other must be left unattached.
The attached end of the end cap is fixed with a dovetail and two bolts. The bolts run through the internal tenon (see earlier post). This area (half the tenon) is also glued. The remainder of the endcap is attached with a single bolt, which enters an oversized hole. There is no matching dovetail at this side of the bench as this would restrict movement.


See, the top is done! Flat.
From the sublime to the ridiculous. In this case, while the end cap looks clean and simple from this angle, I did go a little OTT with the dovetail that attached the face side.
I decided that since I did not plan another bench build for ... ever ... and that there was only one dovetail I could cut, I would do something interesting. There was only one shot at this and I would have some fun.
For those who are not interested in a short pictorial of building a half blind (half lap) houndstooth dovetail involving one h-u-g-e board, then simply skip to the end.
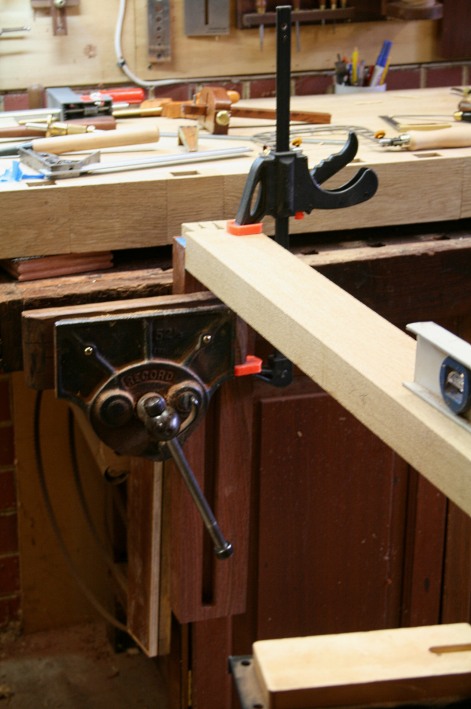
What made this even trickier was that I was struggling for space. I clamped the tail board in my Record vise at an angle, thus ...

... and was forced to saw the lines from the opposite side ...

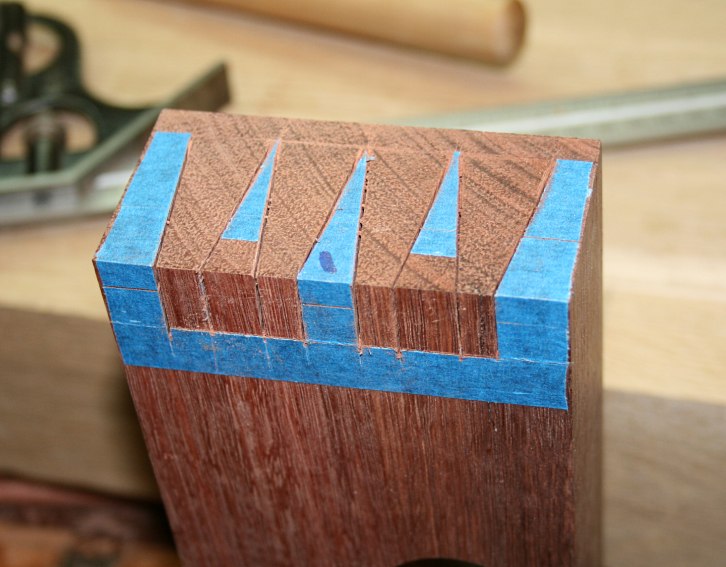
Ok, here you are - the layout for the houndstooth dovetails. There are a couple of reasons for using this format. The first is that the end cap is 2" wide (to maximise the internal screw length) and 4" deep (to get the vise wheel below the bench top). Anything other than slim dovetails would end up looking blocky. Several "normal" tails would look too busy. Houndstooth tails could break this up.
Secondly, you may note that the tails are offset on the tail board. This is deliberate in order to centre the tails as the tail board is 3 1/2" wide and has to join a 4" wide pin board.
The tail waste is removed with a fretsaw ...

.. and then the remaining waste is chiseled out ...

Transfering
tails to pins was fun! ![]()
In
addition to the balancing act here, the kerf for the tails was so
tight that a standard narrow marking knife would not fit. I quickly
whipped out my Vesper extra-slim marking knife ... (I have to find
space for a plug for Chris Vesper ![]() -
great toolmaker) ..
-
great toolmaker) ..
Here is the extra slim alongside a standard slim marking knife ...

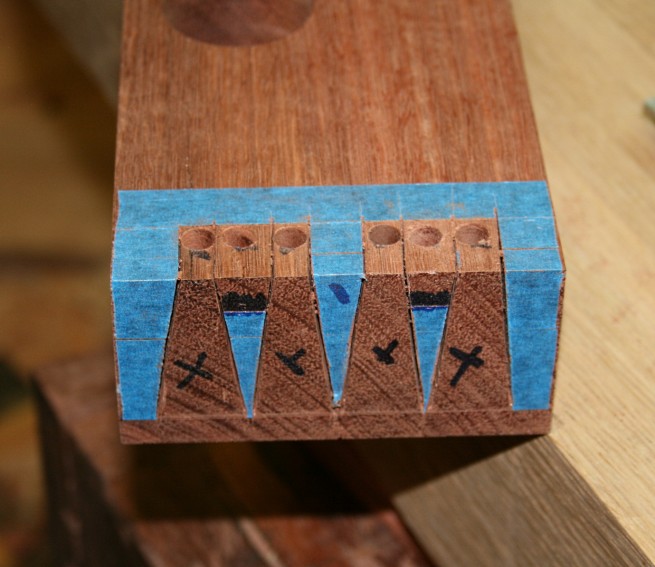
Time for the Blue Tape Method!
Place blue marking tape over the area where the marks will be transferred ..

Transfer the marks ...

Peel away the waste (at this stage I leave the short pins as long pins) ...

This makes it so easy to saw to the line. Here are my saw cuts. Can you see the kerfs?

Now you can remove the tape from the waste area of the short pins ...
At this point I deepen the kerfs with a kerf chisel (its on my website under Shopmade Tools) ..

Drill the waste to the depth of the pin. This will make it easier to split out the waste (rather than spend hours chopping it away) ..
Chop it out about 2/3 of the waste ..

Remove the remaining waste (this is basic stuff), using a backing board. Note that the short pins are still intact at this stage ...

Now you can pare them to length ...

If you are using a Moxon vise, as I am, lower the pins level with the top of the vise. The board may now be used to flush the base of the pins ...

Here you are, nice and tidy ..

Slight tangent ...
With so little room to move in I stumbled over the tail board, which went crashing to the ground, and dented the end near the tails. Fortunately the tails were not damaged. Still, not needed at this point.

I had to leave the dent wrapped in a wet paper towel for an hour or so to try and swell it out ..

It worked reasonably well. Then, without further ado, and with my heart in my mouth, I added glue to the pins and wacked in the tails. The result was decent, and so I set about glueing the end cap/side board to the bench top ...

What
that .. can't see ... the clamps are in the way? ![]() OK
...
OK
...


I’m happy.
Later …
I replaced the coach bolts. I was not happy with the idea of relying on end grain to support the threads.
I really do know know why - call it a senior moment - but I drilled out the first underbench bolt hole with a router. Noisy, the smell of wood burning, and s-l-o-w! Ugh!
The light came on, and I switched to a 12" brace with 3/4" bit.
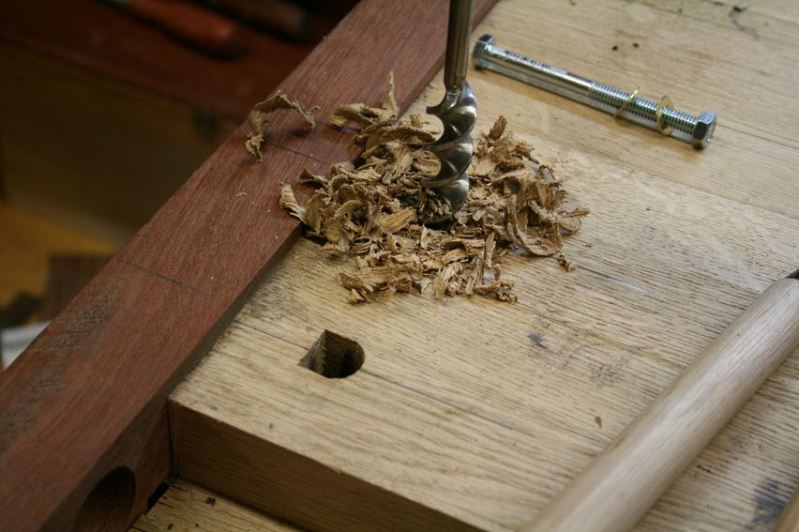
It was amazing how much faster - and effortless - this was. The European Oak is so much softer than Jarrah. Once the hole is to depth, chisel a flat side for the nut.

The bolt hole is slightly oversized (for expansion) and is slightly deeper than the underbench hole for ease of tightening.

Here are the first two holes ...

Handpower rules!

Regards from Perth
Derek
February 2012