Low Tech Blade Heat Treating
Here is a low tech method for heat treating a blade. Low tech in that it requires the least amount of time and equipment. The big advantage is that it can be done in about 10 minutes.
Here is the situation ...
I made a chisel yesterday for a woodworking friend. The basis of the chisel was the blade out of a black, plastic handled Stanley I have had for 10 or more years. The steel is reasonable, but on the too soft side to hold an edge for long, and the black handle is just plain Horrible.
Here are the shoulders being ground …
I wanted to turn this into a nice looking chisel that could be used for paring dovetails. Having ground the shoulders of the blade until they were narrow (there is a pictorial on my website here), the next thing I did was to wack off the handle (easily done with a hammer). This was the result. You can see the interesting tang ...
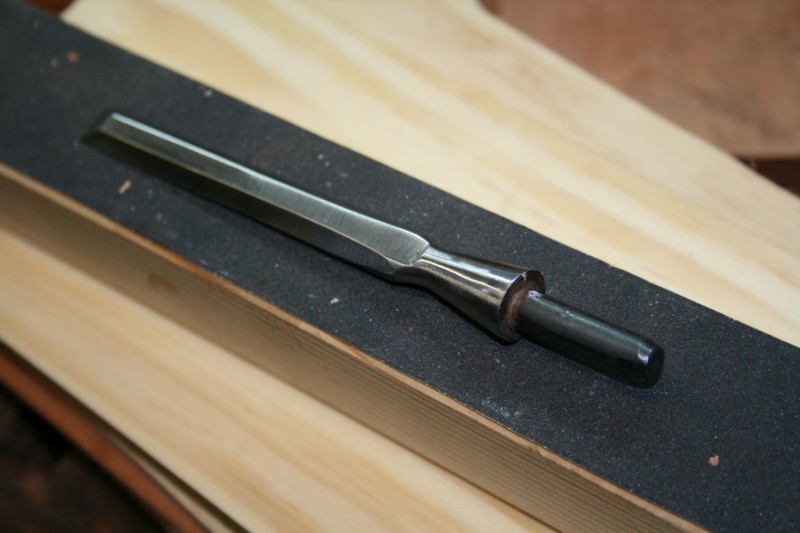
Incidentally, the Marples/Irwin blue handle chisels look the same.
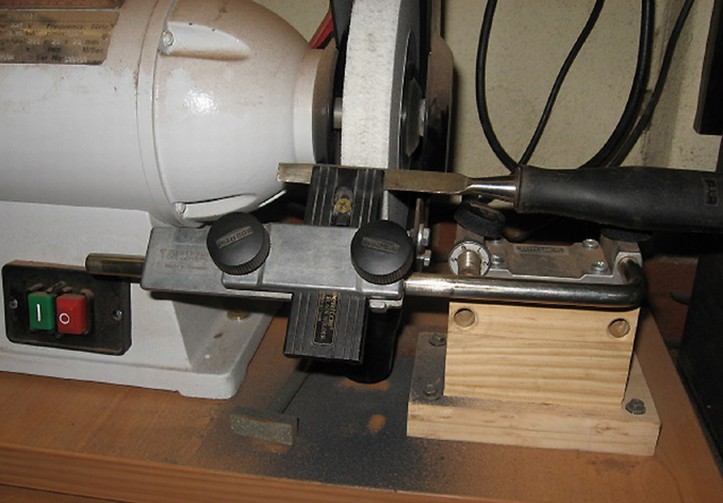
The heat treating was done with two butane torches (if I was working with a large blade I would work with the blade on a brick to increase heat) ...

Alongside is a tin of peanut oil for part-quenching. Why "part-quenching"? Because I have no idea what the steel is. I suspect it is a O1 type rather than a W1 type. So I plan to quench in oil (which can be too slow for W1) and then re-quench in water. I have done this before successfully - any comments?
I do not heat the steel to cherry with the lights on. It is difficult to judge colour in the light, so the lights go off and I am left with a gloom.

I did not think to take a picture of the cherry (partly because it was difficult, but mainly because I only thought of pictures after this stage!). So just imagine cherry red for the first 2" of the blade. Then dunked in peanut oil until still warm, and then under cool water.
A file slides off the steel (i.e. the steel is harder than the file), so I consider it ready for the next stage.
First I clean off the blackened steel with fine sandpaper, getting back to a bright surface (all the better to see the colours in the next stage). So it is time for tempering.
Back to the torch - this is what I meant by low tech. I start about 2" back, get the steel hot and watch the colour changing as it moves along the blade towards the bevel end. As it get the palest of yellow I immediately quench it in the oil and again the water.
Here is a picture. The flash has made the yellow a little whiter than it actually was, but the steel was a very light straw at the tip.

The blade is now cleaned, lapped on 400 grit diamond stone, 1000/5000/12000 Shaptons - however I must point out that only the last 1" behind the bevel was lapped to 12000.

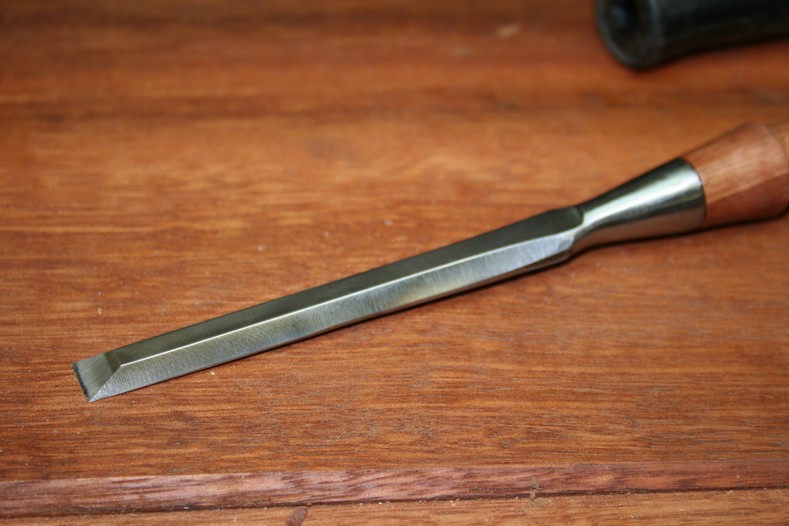
The final chisel looks like so ..

The proof of the pudding lies in the eating. Paring endgrain Radiata Pine (Truly Horrible Stuff). Blade needs to be sharp for this ...

It held up well in very hard wood as well. This is Wandoo endgrain - one of the hardest woods in the world.

Open for discussion ..
Scott Grandstaff: Even better for me is to place the tool on the oven rack as I am baking a cake or pie. 35 to 50 minutes at nominal 325/350 does a fine job for me.
Warren: The smith heats the tool to cherry red then quenches the tip, hardening an inch or so. At this point the tip is cold and hardened but further back is not hardened and is still quite hot. He quickly cleans the tip with a wire brush so he can see the colors. As the heat from the hot portion moves towards the tip it gradually tempers the hardened zone. One can see the bands of colors slowly move down toward the tip. When the appropriate color reaches the tip he quenches the whole tool so that no more tempering occurs. At the time of this quenching, the area near the tip is the coolest so it will be the least tempered and therefore the hardest. Further back, closer to the portion left hot in first quench, the steel will have reached higher temperatures and so it is more tempered (softer). At the time of the second quench the back portion of the tool is no longer cherry red, not hot enough to become hardened.
Ron Hock: Hi Derek, Your technique is fine, and obviously successful; congratulations! I'll elaborate on two points, however. One, forget the cold water part of the quench. If it's oil-hardening steel, it will quench quite well in oil and if it's water-hardening, it MIGHT quench in oil but probably not. The extra cooling won't matter and may contribute to problems. The official procedure is to allow the quench to cool the steel just enough so you can handle it then temper immediately. The transformation we seek takes more time than the quench and dimensional changes can continue to occur for some time*. With thick pieces of steel, the insides may still be growing while the outside has already shrunk and can therefore fracture. I've never had this occur but experts say it can so temper immediately.
Next, the surface colors start to form around 375F which is fine for most edged tools but we like ours a bit harder and use 325F for Rc62 in O1. So that light straw edge will work well and be easy to sharpen but it won't hold an edge as long as it could if tempered to 325F. I recommend an accurate oven or deep-fryer to temper steel to 325F if you want Rc62. Otherwise you have to stop the torch-temper just before the color appears. Like that joker on the bus who, when asked which stop to use says, just watch me and get off at the stop right before I do.
Derek Cohen: It is interesting that you recommend a colour lighter than light straw (essentially white) since that has been the traditional recommendation forever (it seems).
Ron Hock: I suspect that the reason "light straw" is the lowest tempering color is simply because it is the first one we can see. There is a lot of conflicting info about which color corresponds to what temperature but my limited empirical testing bears out that for Rc62 you have to get off the bus at the stop before I do.
This thread and the recent one about heat treatment at SMC tell me that when all is said and done, there are numerous ways to successfully harden tool steel and that the range for "success" is fairly large. I've tried to offer what I've learned from "official" sources but will never argue with seat-of-the-pants success. So, to anyone out there wishing to try their hand at hardening some tool steel, go for it!
Regards from Perth
Derek
August 2010